New Features
- The latest version is 3.4.2, updated on April 2, 2022.
- Physical based energy attenuation algorithm.
- Built-in Surface Heat Diffuse Skinning add-on.
- Built-in Corrective Smooth Baker add-on.
- Complete skinning solution.
- Supports Blender v2.78 - v3.3.
How Can It Help Me?
The add-on can help you to resolve three skinning problems:
1. Blender throws a message: 'bone heat weighting: failed to find solution for one or more bones'.
2. Some body parts or accessories are ignored, you have to fix vertex weights by hand.
3. You have spent a long time to fix vertex weights, but you are still not satisfied with the result.
Quick Start
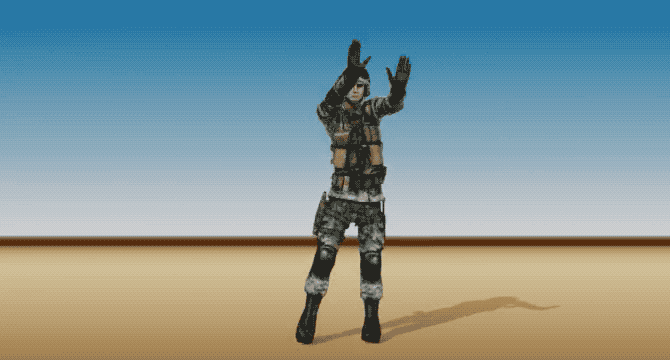
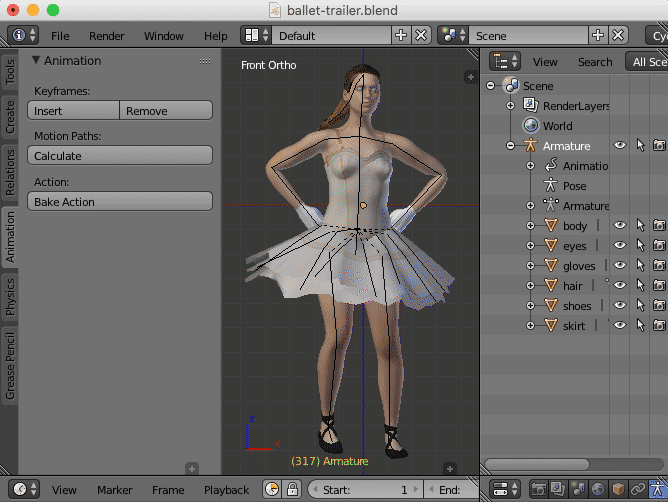
The soldier has a lot of equipments, even if you are a skilled artist, it will take a long time to skin the character.
You can use this add-on to generate perfect vertex weights for the soldier in less than five minutes.
What the artists say:
"Outstanding! You saved me a ton of work!"
"I think you may have saved my life with this add on. Of all the add ons I've bought, for what I'm doing and how it's helping me, this is NUMBER ONE! thanks!"
You may find more comments in the Ratings page.
Full Tutorial:
Video Package: Download the HD version of the video(Format:zip,Size:15MB,Date:Jun 17,2021). new
Watch Online:
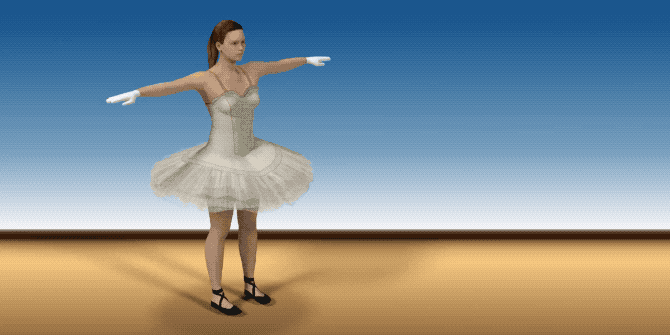
The Story
Two months ago(2017), I needed another 3d character for our educational product, so I quickly generated a character within 'MakeHuman', when I tried to bind the character to the armature in Blender, the result frustrated me - The hair broke into pieces, the eyes were drifting in the sky, and there were holes in the body.
If the character is watertight, Blender's built-in automatic armature deform will work very well, but artists work in their own way, they create various character components, then group them together, this is artists' most natural workflow.
I used to subscribe Maya LT from Stream platform several years ago, Maya LT has an amazing feature - 'Geodesic Voxel Binding', it can deal with non-watertight character, why not add the feature to Blender?
My goal is to achieve better result and better skinning solution, not a simple copy from May LT.
When the product was born, I was so proud of the add-on, it uses unique ray tracing technology to build voxel grid, which is super robust and accurate, and the add-on combines Blender's built-in heat map diffuse skinning tool and the voxel heat diffuse skinning tool to deal with all skinning issues, I can always get perfect results.
It's a milestone, Blender has the world's best armature deform portfolio today.
That's the story of this add-on.
Introduction
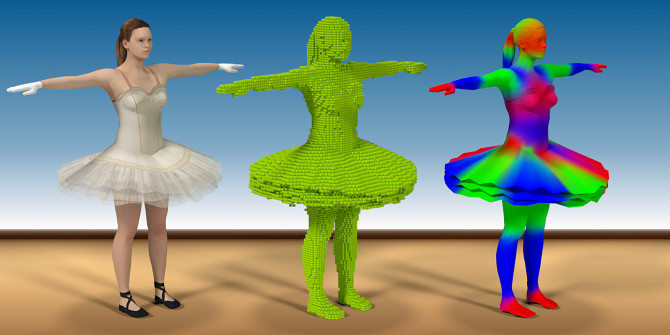
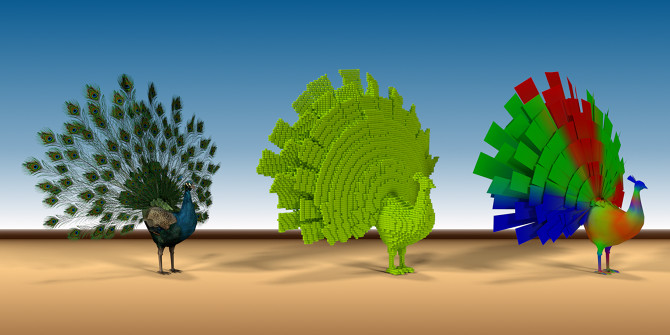
Traditional heat map diffuse skinning algorithm can only deal with watertight meshes, but artists create character components in their own way, then group them together to a character, usually the character is not seamless, this often cause traditional heat map diffuse skinning algorithm to fail.

Voxel heat diffuse skinning algorithm can overcome the shortcoming, it converts the non-seamless character into a solid statue, heat diffuses in the solid statue, so we can get the most natural vertex weights.

The voxel heat diffuse skinning had already been equipped in Autodesk's Maya and 3ds Max for years, but Blender users don't have an opportunity to benefit from the feature.
Traditional heat map diffuse skinnging algorithm can get much better result in detailed areas such as fingers and toes than voxel heat diffuse skinning algorithm, we can combine them to get perfect result with this Blender addon.
We believe that all digital artists and game teams want this feature, fortunately, you can do perfect automatic vertex weight skinning within Blender today.
Interface
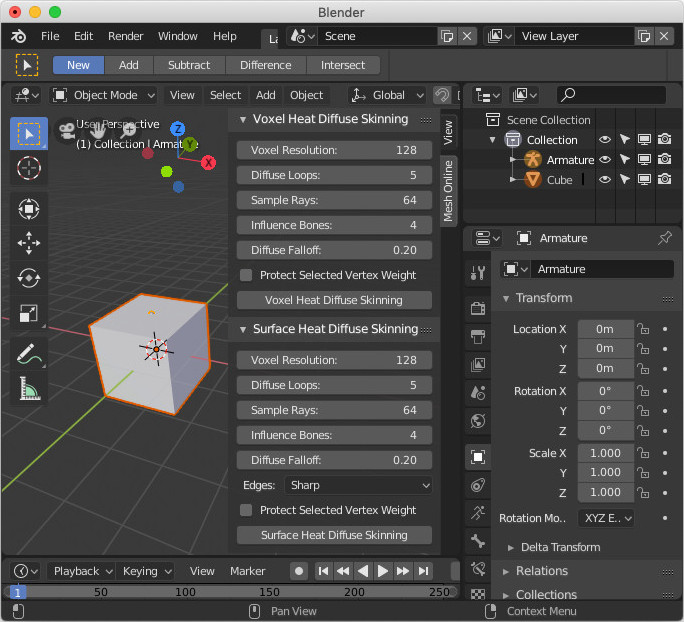
When selecting all the sub-meshes and the armature, the interface will appear in the animation tab of the tools shelf, one mouse click to finish voxel heat diffuse skinning.
Tutorial
Video Package: Download the HD version of the video(Format:zip,Size:119MB,Date:Oct 10,2017). new
Watch Online:
Tutorial By CGDive:
Blender Version
Proved Blender version: v2.78 - v3.3
Platform
Linux(x86_64)
Windows 7-11(x86_64/x86)
macOS 10.9-12.2(x86_64)
Note: The add-on supports both 64 bit and 32 bit of Windows.
CPU
The algorithm uses multiply CPU cores to boost the running speed, more CPU cores, more faster it runs.
Memory
The algorithm needs large memory to run high voxel resolution, the computer's memory is at least 8GB
Where To Buy
Github(Last updated on April 2, 2022): new
Surface Heat Diffuse Skinning - Blender Add-on v3.4.2 (FREE)
Blender Market(Last updated on April 2, 2022): new
Blender Market Store - Voxel Heat Diffuse Skinning - Blender Add-on v3.4.2 ($30)
How To Install
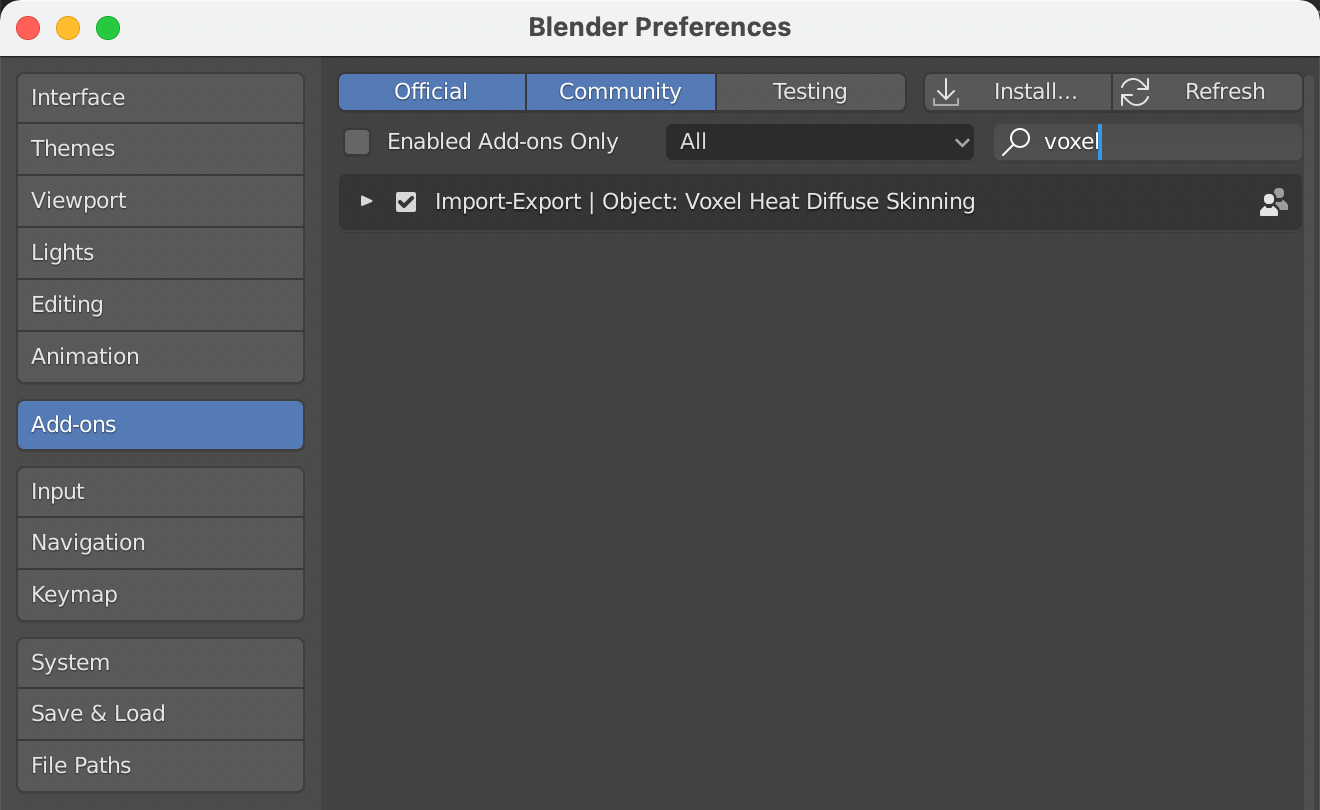
Launch Blender, navigate to File->User Preference->Addons, click the 'Install Add-on from file...' button, a pop up dialog will appear, select 'voxel_skinning-2.7-3.4.2.zip' or 'voxel_skinning-latest-3.4.2.zip', click the 'Install Add-on from file...' button on the pop up dialog, the add-on will be installed to Blender's addons directory.
Note: Please install 'voxel_skinning-latest-3.4.2.zip' in Blender 2.8 or later versions.
When the pop up dialog closed, we are still on Addons page, a few seconds later, the add-on will appear, activate the add-on, then click the 'Save User Settings' button and close the 'Blender User Preference' window.
Note: Please don't simply copy and paste the unzipped add-on directory to Blender's own working add-on directory, because the operating system may prevent the add-on from writing temporary data to the directory, which will cause the add-on don't work at all.
How To Upgrade
Download the new version of the product.
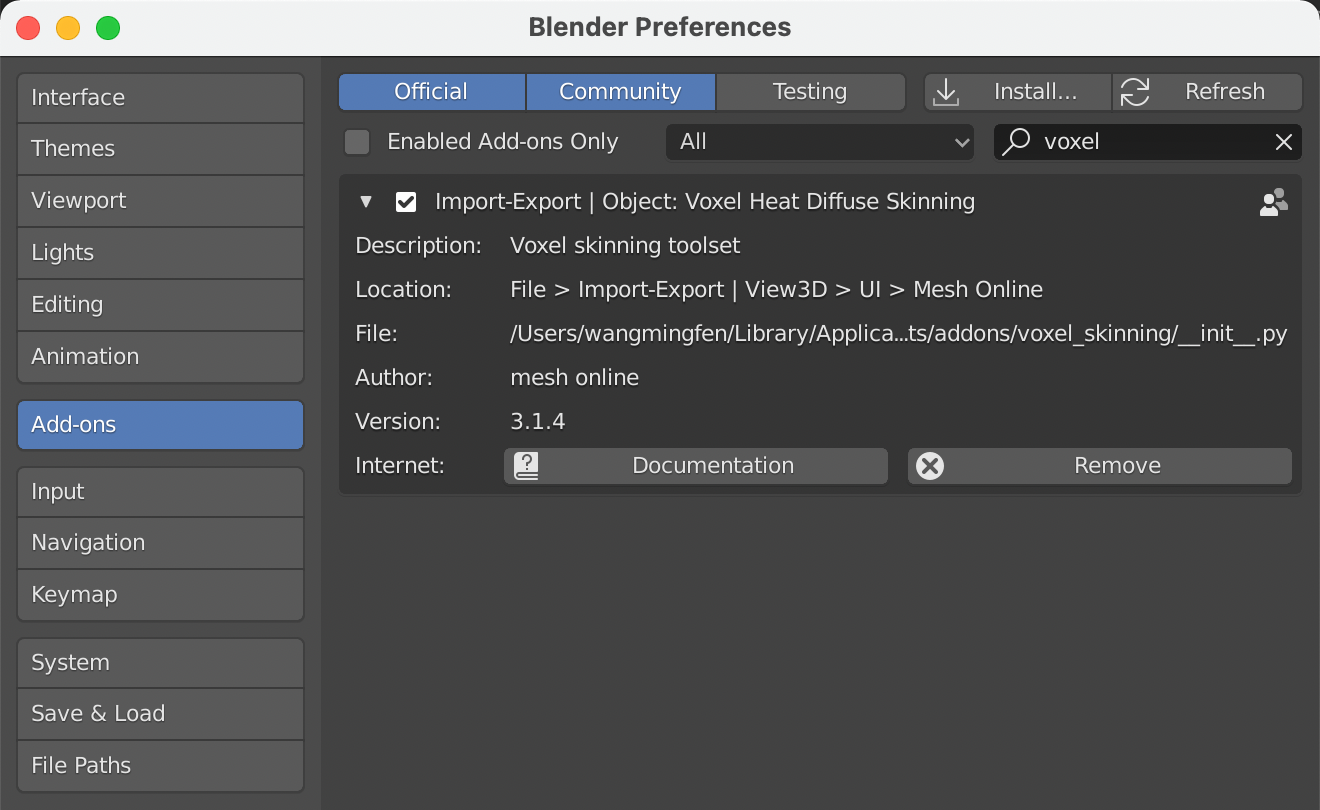
Launch Blender, navigate to File->User Preference->Addons, type 'voxel' in the search box, the add-on will appear, click the small triangle beside the add-on to expand the contents, click the 'Remove' button to remove the add-on.
Install the new version of the product.
Blender 2.8 Support
The latest version supports Blender 2.8.
Please re-download your product and extract the package, there are two sub-directories named by Blender version, you may choose the corresponding version to install.
Type 'n' key in the 3d view if the sidebar is hidden. If you select both the meshes and the armature, the user interface will appear in 'View3D->UI->Mesh Online' tab of the sidebar.
Personal Workflow
Select all the sub-meshes and one armature, the interface will appear on the tool shelf section of 'View3D->Tools->Animation'.
Because the alogrithm will convert all the sub-meshes to one solid statue to obtain best result, you'd better select all the sub-meshes and one armature before you run voxel heat diffuse skinning.
If you are rigging for RPG games, the armature is usually not complicated, you can use the default parameters, select all the sub-meshes and the armature, click the 'Voxel Heat Diffuse Skinning' button, the result will be fairly good.
Here are the steps:
1. Select all the sub-meshes and the armature, click the 'Voxel Heat Diffuse Skinning' button.
If you are rigging for a movie, the armature is usually rather complicated, in this case, we combine traditional heat map diffuse skinning and voxel heat diffuse skinning to get perfect result:
Here are the steps:
1. Select all the sub-meshes and the armature, type 'Control' key + 'P' key, from the pop up menu, click Armature Deform->With Automatic Weight.
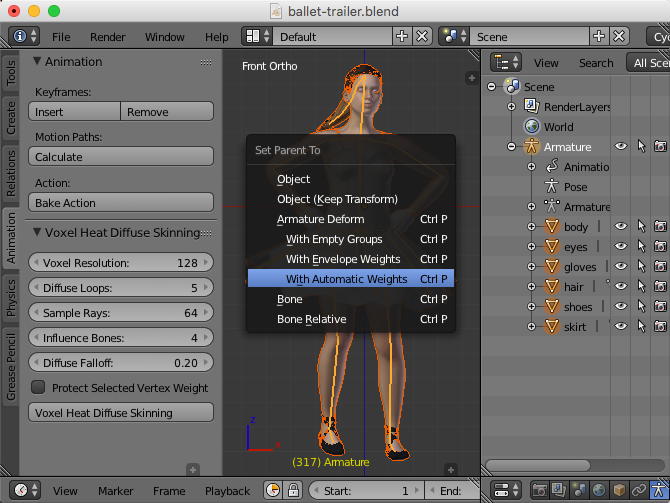
2. Select the sub-mesh which vertices need to be protected, type 'Tab' key to enter 'Edit' mode, type 'Z' key to enter wireframe display mode, type 'A' key twice to select nothing, use either box select tool or circle select tool to select character's hands parts and feet parts(if the character does not wear shoes), or other very detailed areas, type 'Z' key to back to solid mode, type 'Tab' key to back to object mode.
3. In the addon's interface, check the 'Protect Selected Vertex Weight' button, all the selected vertices' weights will be merged to new weights which generated by voxel heat diffuse skinning.
4. Select all the sub-meshes and the armature, click the 'Voxel Heat Diffuse Skinning' button.
Team Workflow
If you have a powerful server, for example, the CPU has 32 cores or more, you can greatly boost the speed by distribute the voxel heat diffuse task to the server.
From the 'Blender User Preference' window, activate the other three addons, click the 'Save User Settings' button and close the 'Blender User Preference' window.
Here are the steps:
1. Select all the sub-meshes, click File->Export->Voxel Mesh (.txt), type a filename, click 'Export Voxel Mesh' button to export a voxel mesh file.
2. Select the armature, click File->Export->Voxel Bone (.txt), type a filename, click 'Export Voxel Bone' button to export a voxel bone file.
3. Copy the two files to the server, and copy the addon's zip file to the server, unzip the addon file, there is a command line tool for each platform: Linux, Windows and Mac, you can find them in the sub-directory of 'voxel_heat_diffuse_skinning'->'bin', in fact, the actual task is done by the command line tool.
4. Open a terminal window, run the command line tool for your platform without parameters, it will report the usage.
5. Run the command line tool for your platform with parameters, the parameters are the same as in the addon's interface except that you need to tell it where the voxel mesh file is, where the voxel bone file is, and where the voxel weight file is.
6. After the command line tool finished runing, copy the generated voxel weight file to the desktop computer. From Blender's 3D View, select all the sub-meshes and the armature, click File->Import->Voxel Weight (.txt), select the voxel weight file, there is a 'Protect Selected Vertex Weight' button in the left panel, check the button if you want to protect some vertices' weights, click 'Import Voxel Weight' button to import the voxel weight file.
Auto-Rig Pro Workflow
This add-on is compatible with Auto-Rig Pro, if you own Auto-Rig Pro, you can first bind all the sub-meshes to the armature with the "Bind" button of Auto-Rig Pro, then use this addon on top.
Here is the document: http://lucky3d.fr/auto-rig-pro/doc/auto_rig.html#voxel-skinning.
I have recorded a short video to show how simple the workfow is, but it is just a basic binding, for more advanced binding, please refer to the above document.
Video Package: Download the HD version of the video(Format:zip,Size:14MB,Date:Mar 26,2022). new
Watch Online:
Built-in Surface Heat Diffuse Skinning Add-on
Blender already has built-in bone heat weighting, it works well in most time, but sometimes it fails to find a solution.
To completely resolve the issue, I created an open source add-on on GitHub:
https://github.com/meshonline/Surface-Heat-Diffuse-Skinning
The surface heat diffuse skinning add-on can generate similar results to Blender's built-in Armature Deform->With Automatic Weight tool, but it never fails.
You can use this free add-on to generate vertex weights for detailed areas when Blender's built-in weight tool fails.
I have added this free add-on into the product, you don't need to download it separately.
The installation and usage are very similar to the voxel heat diffuse skinning add-on.
Select all the sub-meshes and the armature, the interface will appear on the tool shelf section of 'View3D->Tools->Animation'.
Simply click the 'Surface Heat Diffuse Skinning' button with default parameters to skin the meshes usually gives you a fairly good result.
Built-in Corrective Smooth Baker Add-on
I have integrated my Corrective Smooth Baker add-on into this add-on, you can use the add-on to fix vertex weight issues automatically, details refer to the product page.
How Does The Algorithm Work?
The algorithm uses ray tracing technology to convert polygon mesh to solid statue, which is quite different from Maya's method, ray tracing always generate better result than multi-view voxelization methods.
Bones generate heats, heats diffuse among the solid statue, and lose a bit heat when diffused to neibour voxels, if we iterate the process, it will reach a balance status.
We use CPU's multiple cores to boost the speed. For example, the CPU of my Mac mini (Late 2012) is 2.5Ghz Intel core i5, it has two cores, but each core supports two super threads, the algorithm will use four threads to generate solid statue and diffuse heats simultaneously.
When heat diffusing process completed, bones heats will distribute smoothly among entire solid statue, the heats values represent the influence weights of the bones.
Though the theory is simple, a good product needs to deal with lots of details.
Our goal is to generate better result and provide better skinning solution for Blender users.
Detail Of The Parameters
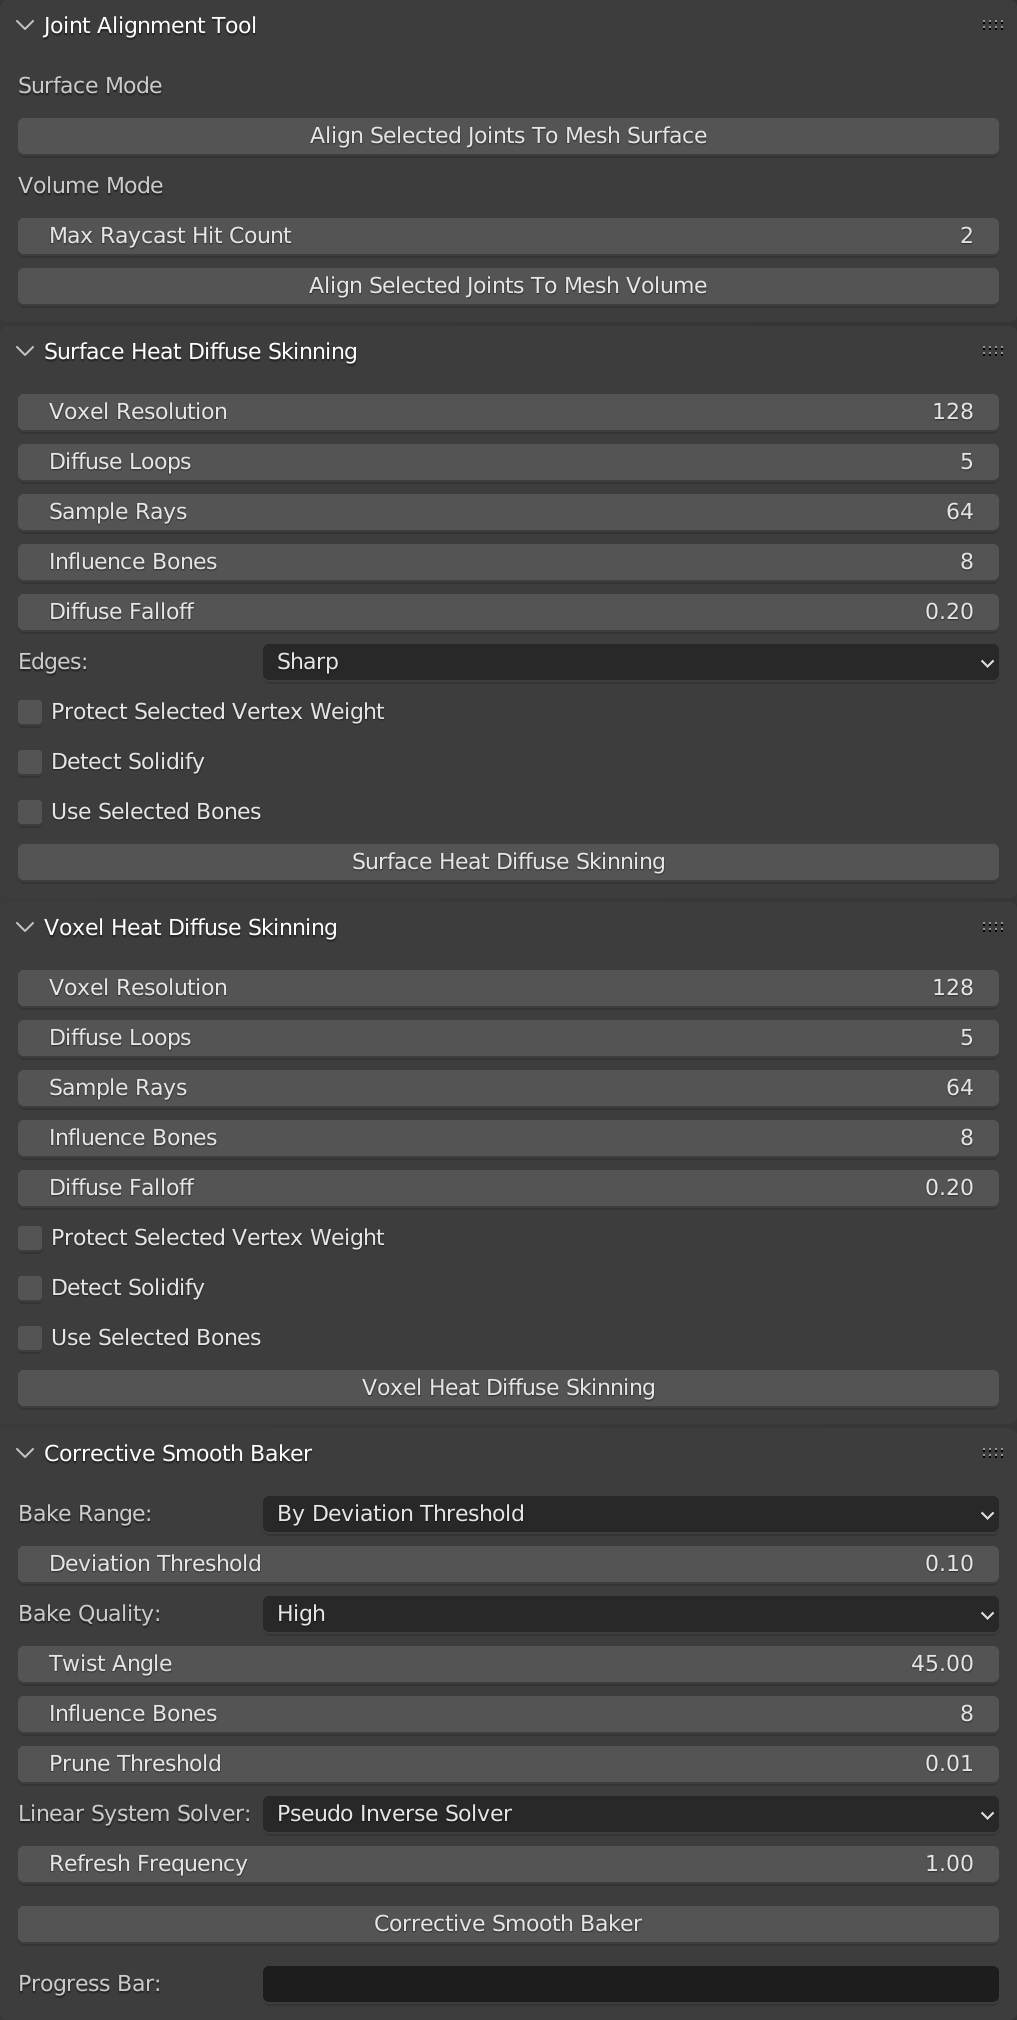
Voxel Resolution: The maximum voxel size, default value is 128, which is suitable for most characters, you may increase this value to use high resolution voxelization, usually this is not necessory.
Diffuse Loops: Heat diffuse pass equal to 'Diffuse Loops' multiply 'Voxel Resolution', default value is 5, which is enough for all cases, you don't need to change this value.
Sample Rays: Use how many random rays to detect darkness, default value is 64, more sample rays, more accurate the solid statue, but runs more slower.
Influence Bones: How many bones will influence a vertex, default value is 8, which is suitable for desktop animations in Blender.
Note: You'd better use a smaller value such as 4 to run animations smoothly for mobile devices.
Diffuse Falloff: How much heat will lose when diffusing, default value is 0.2, which is suitable for most cases, more bigger the value is, more sharper the weight change will be.
Protect Selected Vertex Weight: If you want to preserve existed vertex weights for some vertices, select these vertices in 'EDIT' mode, quit 'EDIT' mode and enable this option.
Detect Solidify: Detect solidified clothes, if you enable this option, make sure that all bones are in the charecter's volume, otherwise, the result may be wrong.
Frequently Asked Questions
Q: What is the difference between the Seats?
A: They are different licenses for different teams. For example, if a small team which has up to 20 artists who need to install the add-on, the team should purchase one license for 20 seats, it is much cheaper than purchasing 20 indie licenses, and the team can't purchase only one indie license and distribute the add-on to all their artists, for it is illegal in law.
Q: How to fix vertex weights of the torso part?
A: If the character uses a simple skeleton, such as motion capture skeleton, the vertex weights of the torso part may not good, the torso slightly moves with the arm movement.
You can fix the issue by adding two support bones at the chest joint to balance the vertex weights.
Q: I'm not sure if my computer can run the add-on?
A: If the CPU of your computer is x86_64 architecture, you can run it.
It supports 64 bit of Windows, Linux and macOS.
Note: The add-on supports both 64 bit and 32 bit of Windows.
Q: When should I use the command line tool?
A: If you want to use higher resolution than 256, for instance, 512 or 1024, you have to use the command line tool.
High resolution mode requires huge memories, and the task will run for a long time, running the add-on within Blender may cause Blender to crash, so you need to run it as an independent task.
Another reason is that you are a team or you have powerful servers, you may build your own automated workflow by writing shell scripts, distribute the heavy task to your powerful servers.
Q: Why solidified clothes have zero vertex weights?
A: The normals of inner side of the solidified clothes direct inwards, this will confuse the voxel skinning algorithm, it may think that the bones are not surrounded by any polygons at all, thus cause the solidified clothes have zero vertex weights.
There is a simple trick to solve the problem:
We can flip all the normals for the solidified clothes, the voxel skinning will work properly, when finished, we just need to flip back all the normals for the solidified clothes.
You can enable 'Detect Solidify' to fix the issue automatically in v3.3.0.
Q: Can I select multiple meshes and skin them to the same armature?
A: Yes, you can.
The feature is available from version 2.0, you no longer need to join the meshes to a big mesh.
Q: There are still a few vertices sticked together, how to fix them?
A: There are two ways:
1. Use 'Protect Selected Vertex Weight' feature, please watch the tutorial to learn more.
2. If there are only a few vertices sticked together, you may clean them manually.
Q: Do you have any plan to speed it up?
A: Yes, the kernel is written in c++, and we have been optimizing the code.
The latest version has achieved six times faster than the initial version.
Q: Should I use high resolution grid?
A: High resolution grid works well on fingers and toes, but high resolution grid may bring side effects on other mesh parts, like the clothes, the hair, or the equipments, these parts may break into pieces in high resolution mode, it's not perfect in all cases.
To combine Blender's built-in heat map diffuse skinning and voxel heat diffuse skinning is a better solution, you always get perfect result.
Q: Does it support pitchipoy version of Rigify?
A: Yes, it supports both official version and pitchipoy version of Rigify.
The add-on is also compatible with Auto-Rig Pro.
Q: Does it support 2d characters?
A: No, the add-on is more suitable for 3d models.
Q: How can I tell a bone not to deform the mesh?
A: When you selected the bone, there is a 'Deform' option in the 'property->Bone' panel, uncheck the option, and delete the bone name from the vertex groups of the mesh, then run voxel heat diffuse skinning again.
Q: What is the benefit of physically based energy attenuation algorithm?
A: Like Cycles is better than Pong shading, physical based energy attenuation algorithm generates much natural vertex weights.
Q: What's the difference of the surface heat diffuse skinning add-on and the voxel heat diffuse skinning add-on?
A: Sometimes, Blender's built-in Armature Deform->With Automatic Weight tool throws: 'bone heat weighting: failed to find solution for one or more bones', then give up.
If this happens, you can't use the advanced skill to protect selected vertex weights, for there is nothing to protect.
The surface heat diffuse skinning add-on can generate similar results to Blender's built-in Armature Deform->With Automatic Weight tool, but it never fails.
You can use surface heat diffuse skinning add-on to generate vertex weights for fingers and toes when Blender's built-in Armature Deform->With Automatic Weight tool fails, then combine voxel heat diffuse skinning add-on to get perfect vertex weights.
Q: How to fix blocky vertex weights?
A: If you skin a high resolution mesh with default voxel resolution(128), the vertex weights is blocky.
You have several ways to fix the issue:
1. Skin the low resolution version, subdivide the mesh after skinning.
2. Add a 'Corrective Smooth' modifier to the mesh in 'Object Mode'.
3. Apply several 'Smooth' operation to all vertex groups from the 'Weight Tools' section in 'Weight Paint' mode.
4. Use high voxel resolution to skin the mesh.
Note: The issue have been fixed in version 3.0.
Q: Can I modify vertices weights after voxel heat diffuse skinning?
A: Yes, you can.
Voxel heat diffuse skinning just gives you a good start point, you can modify vertices weights anytime.
Q: What's new in version 3.0?
A: From version 3.0, the add-on has become a complete skinning portfolio:
Even if Blender's built-in bone heat weighting fails, you can use surface heat diffuse skinning add-on to generate vertex weights for fingers and toes, then combine voxel heat diffuse skinning add-on to get perfect vertex weights.
In short, version 3.0 gives you a complete skinning solution.
Q: Why the add-on does not appear?
A: Please select both the meshes and the armature in 'OBJECT' mode, then the add-on will appear.
License
The license of this add-on is "GPL".
The add-on interacts with a universal text format.
The product package also includes an external command-line utility, which interacts with the universal format.
The external command-line utility is written in c++, which links to c++ libraries to generate the binary file.
The add-on uses the external command-line utility via a simple system call.
Note: The external command-line utility is NOT under GPL license.